Classes & Pupils
The CLASSES tab on the home screen lists the classes you can see. What you see depends on your role: a regular teacher sees only their own classes; the head teacher sees every class at the school grouped by teacher. See Head teacher vs regular teacher for the full comparison.
1. Open the CLASSES tab
Section titled “1. Open the CLASSES tab”From the School home screen, tap the CLASSES tab.
Regular teacher view
Section titled “Regular teacher view”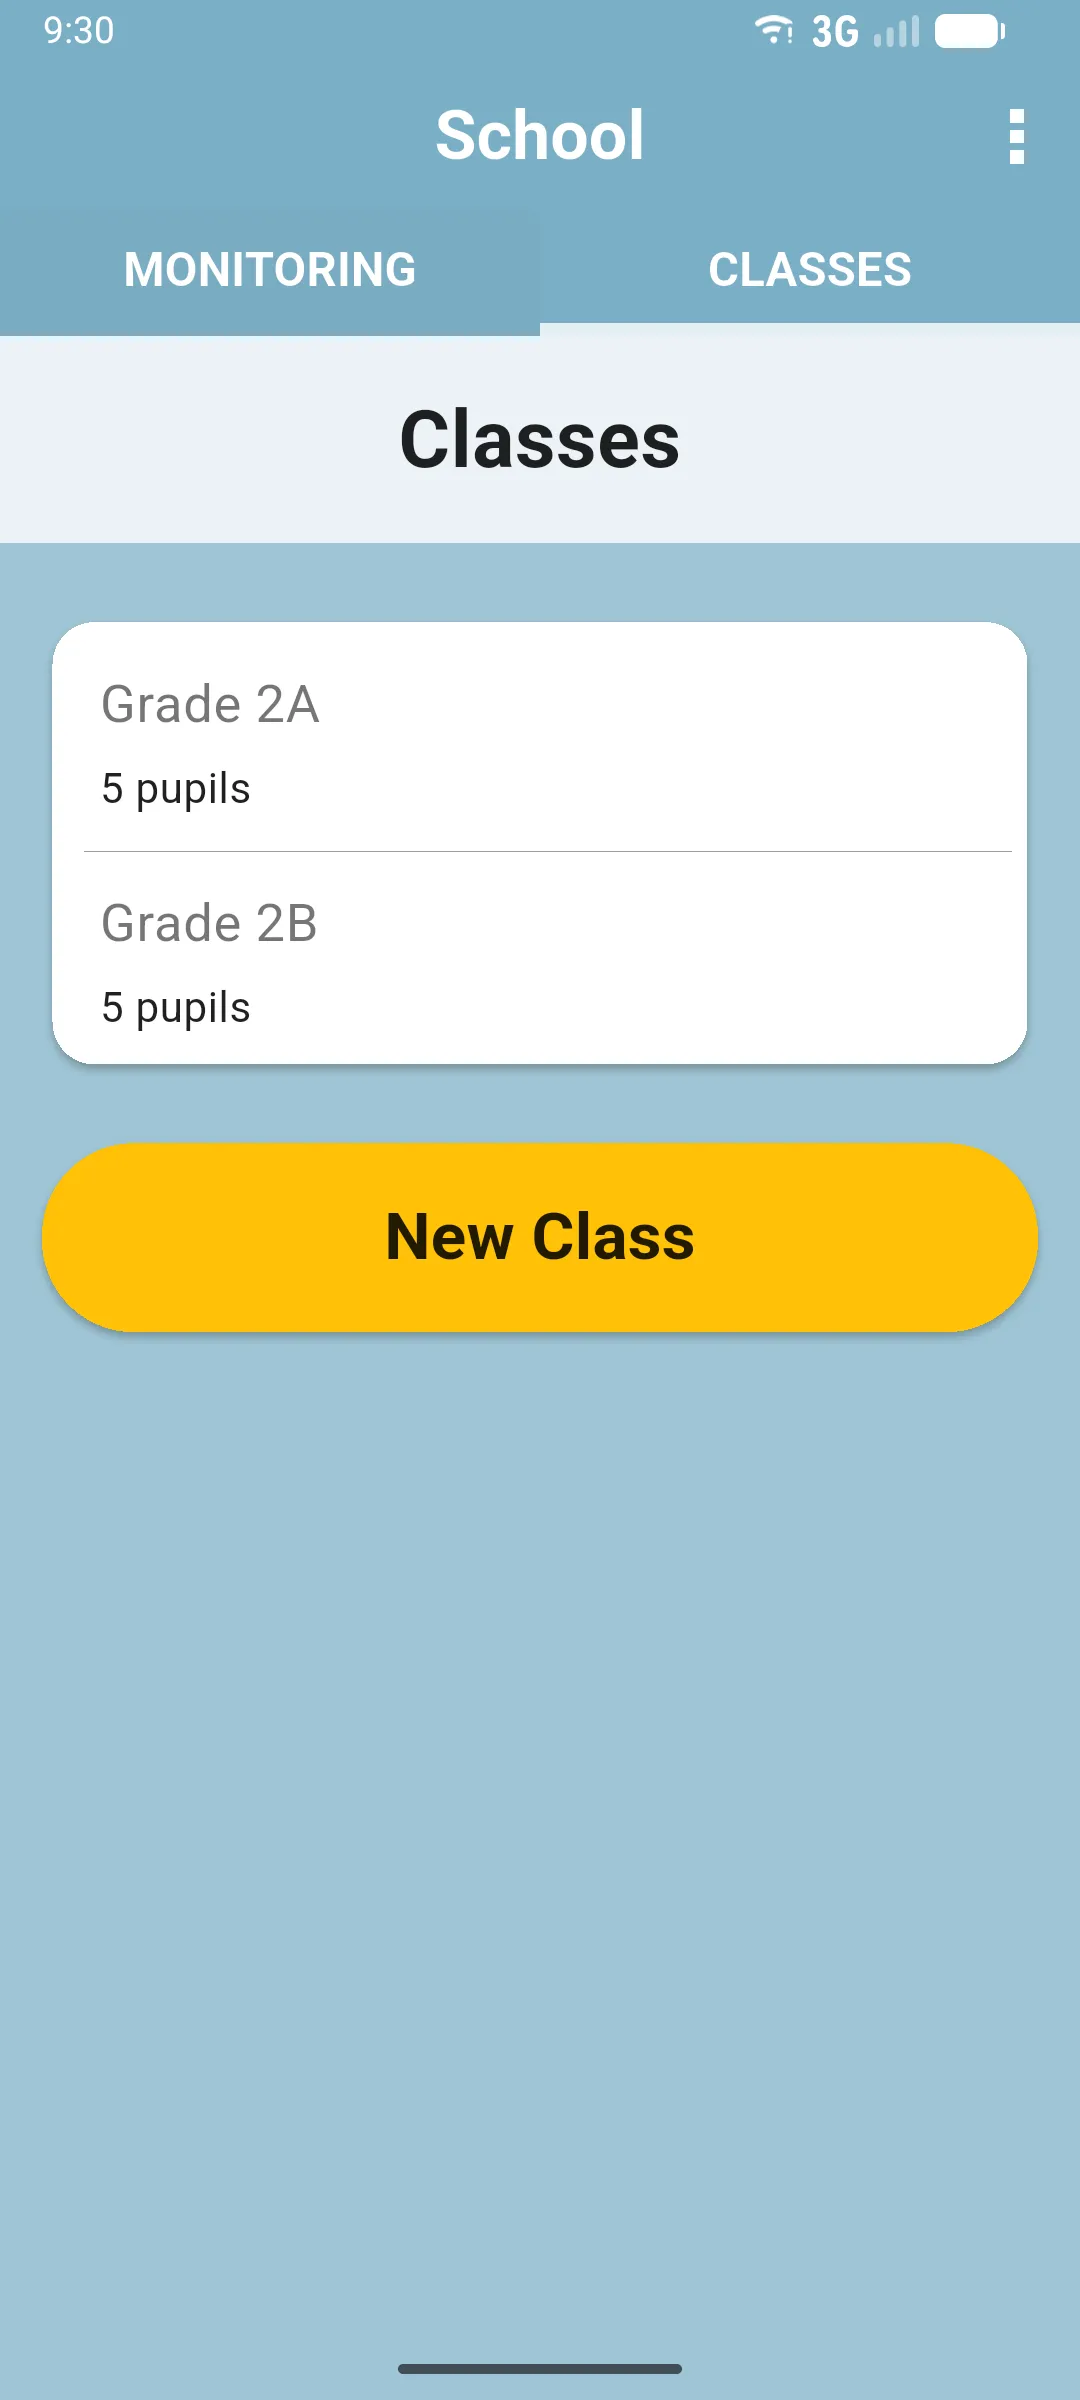
You see one card per class you teach, each showing the class name and the number of pupils. The yellow New Class button lets you create a new class assigned to you.
Head teacher view
Section titled “Head teacher view”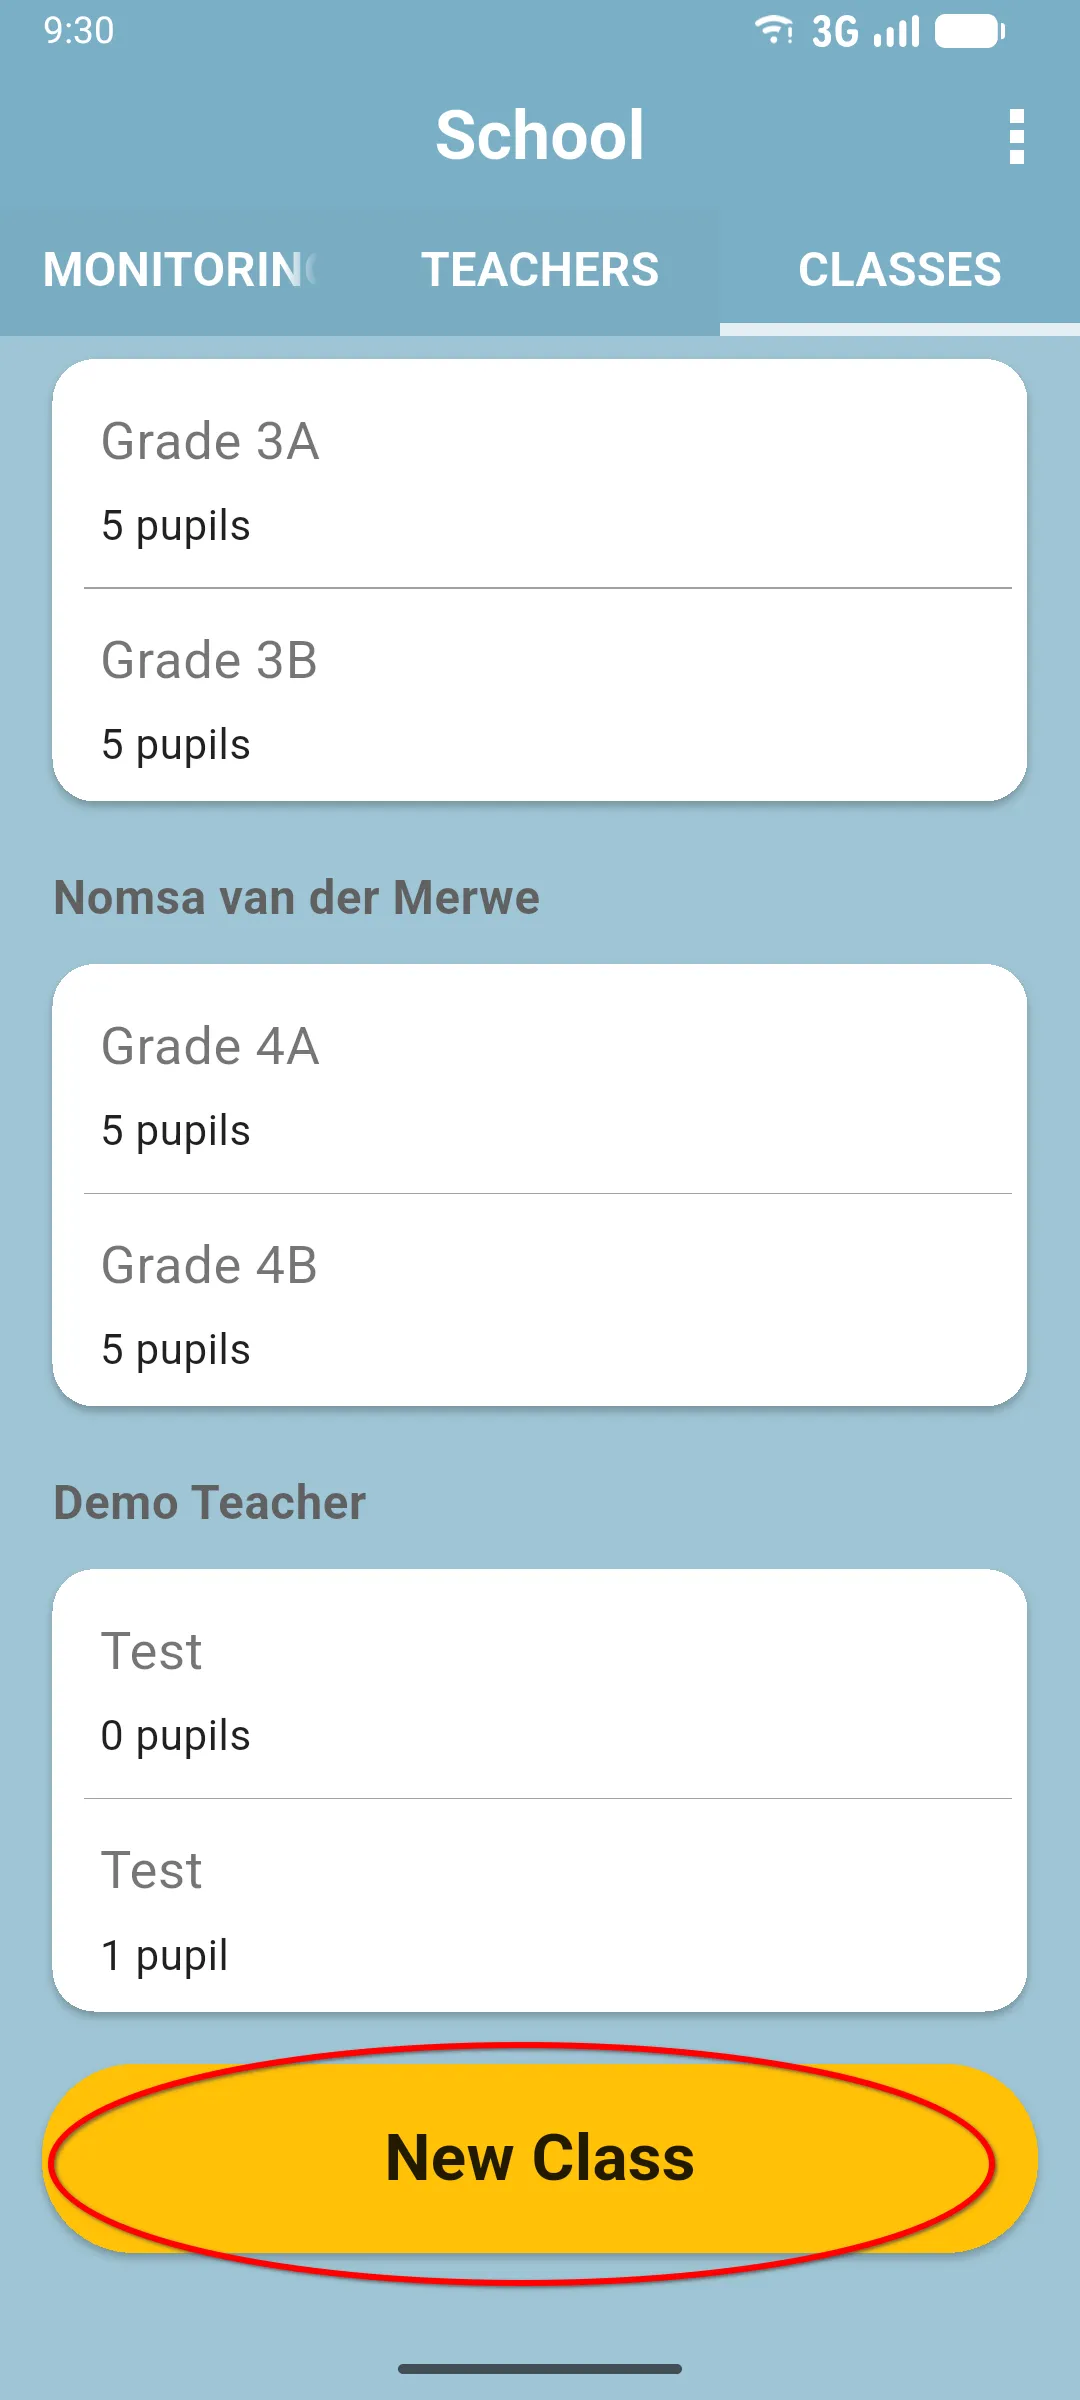
The classes are grouped by teacher: each teacher’s name is a section header and their classes appear underneath. The New Class button at the bottom works the same as for a regular teacher, and a class you create is assigned to you.
2. Open a class
Section titled “2. Open a class”Tap any class card to view it.
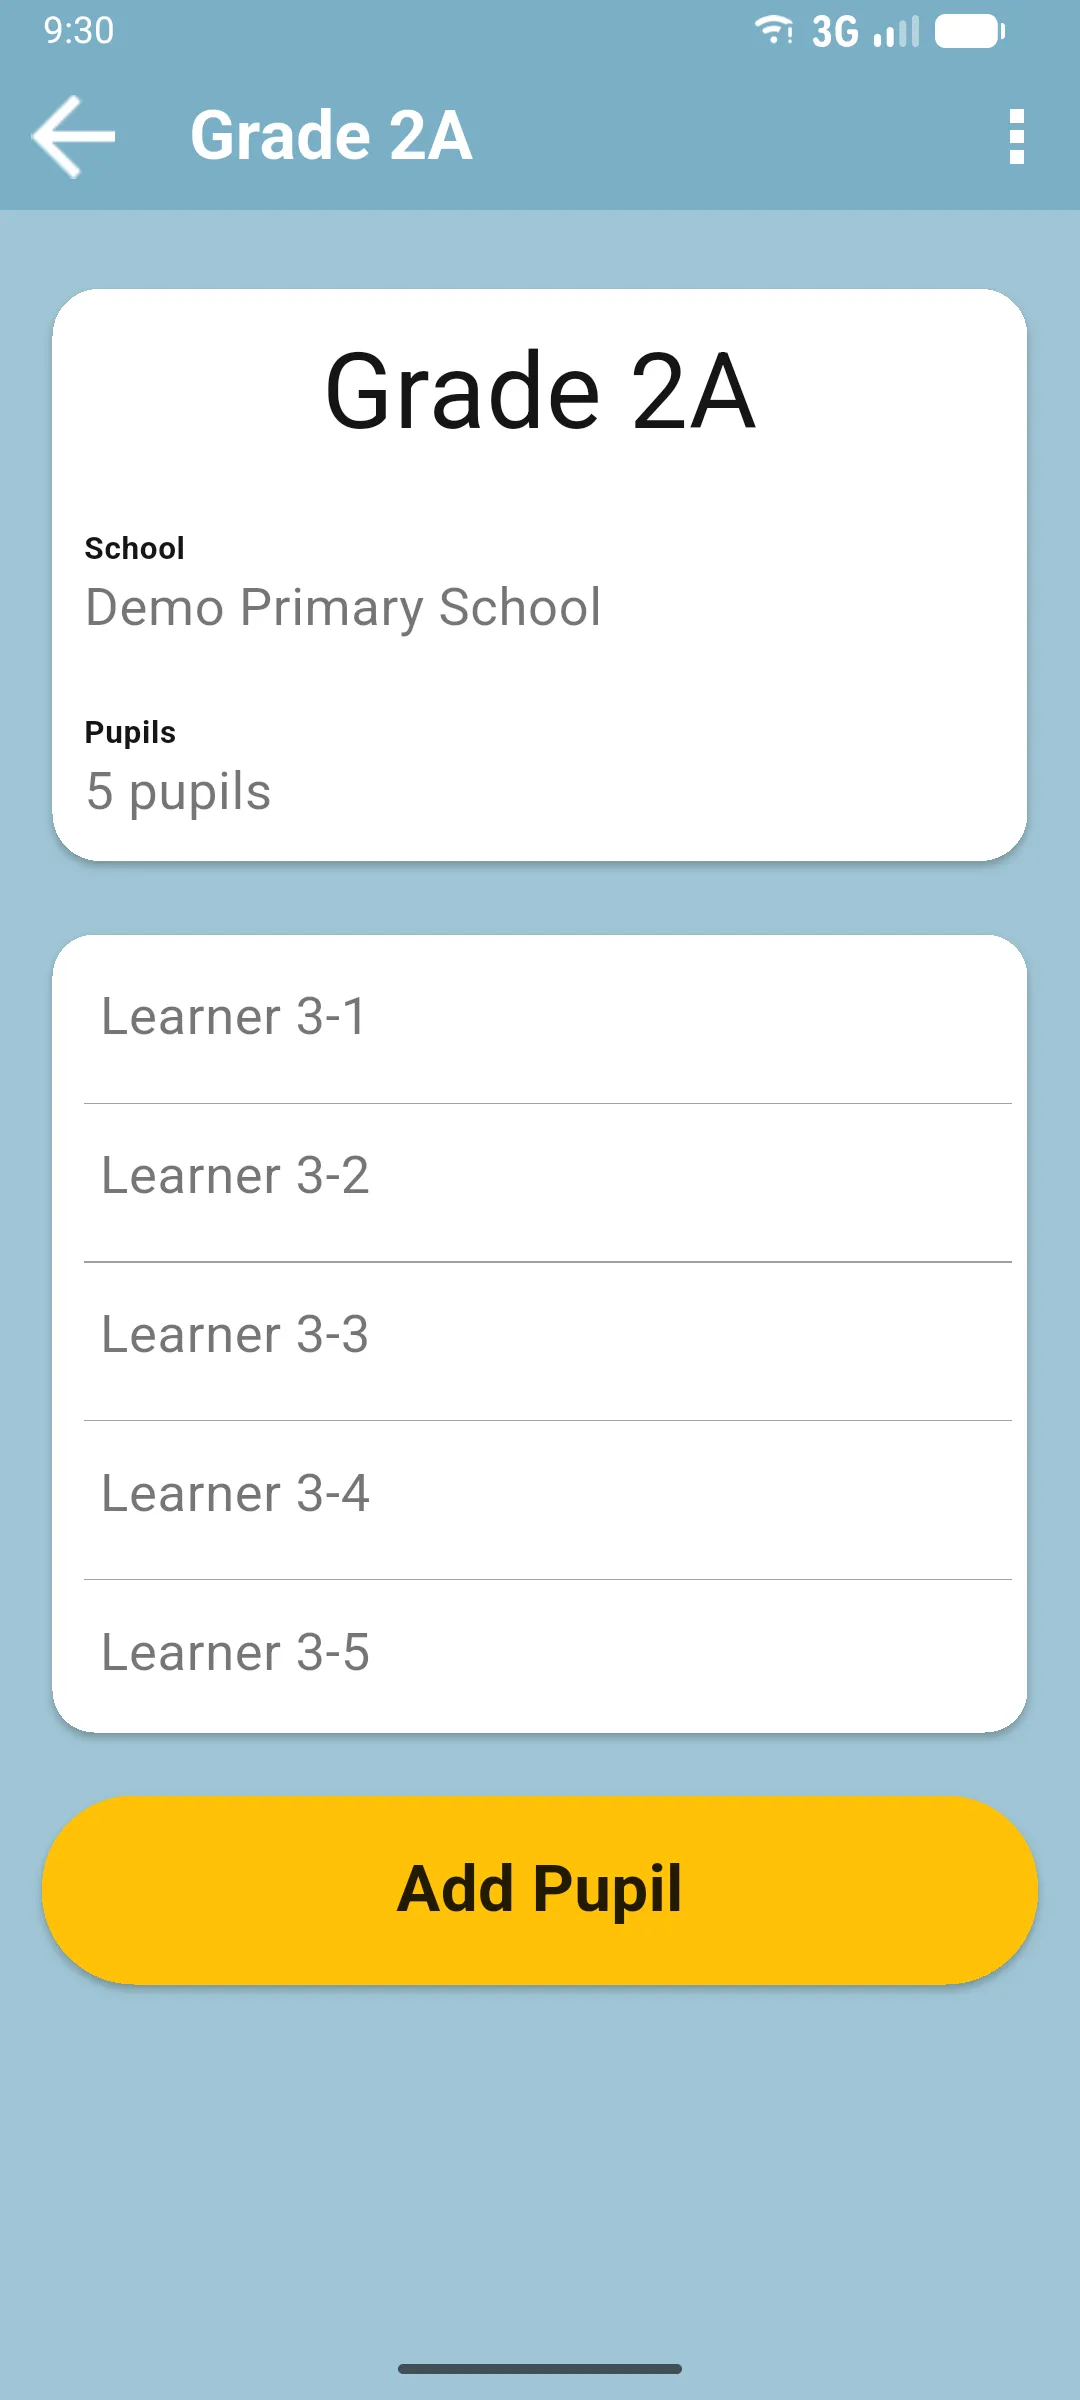
The class screen shows:
- The class name at the top.
- The School the class belongs to.
- The Pupils count.
- A card per pupil with name and age.
- A yellow Add Pupil button to add a new pupil to the class.
3. Open a pupil
Section titled “3. Open a pupil”Tap any pupil card to view their profile.
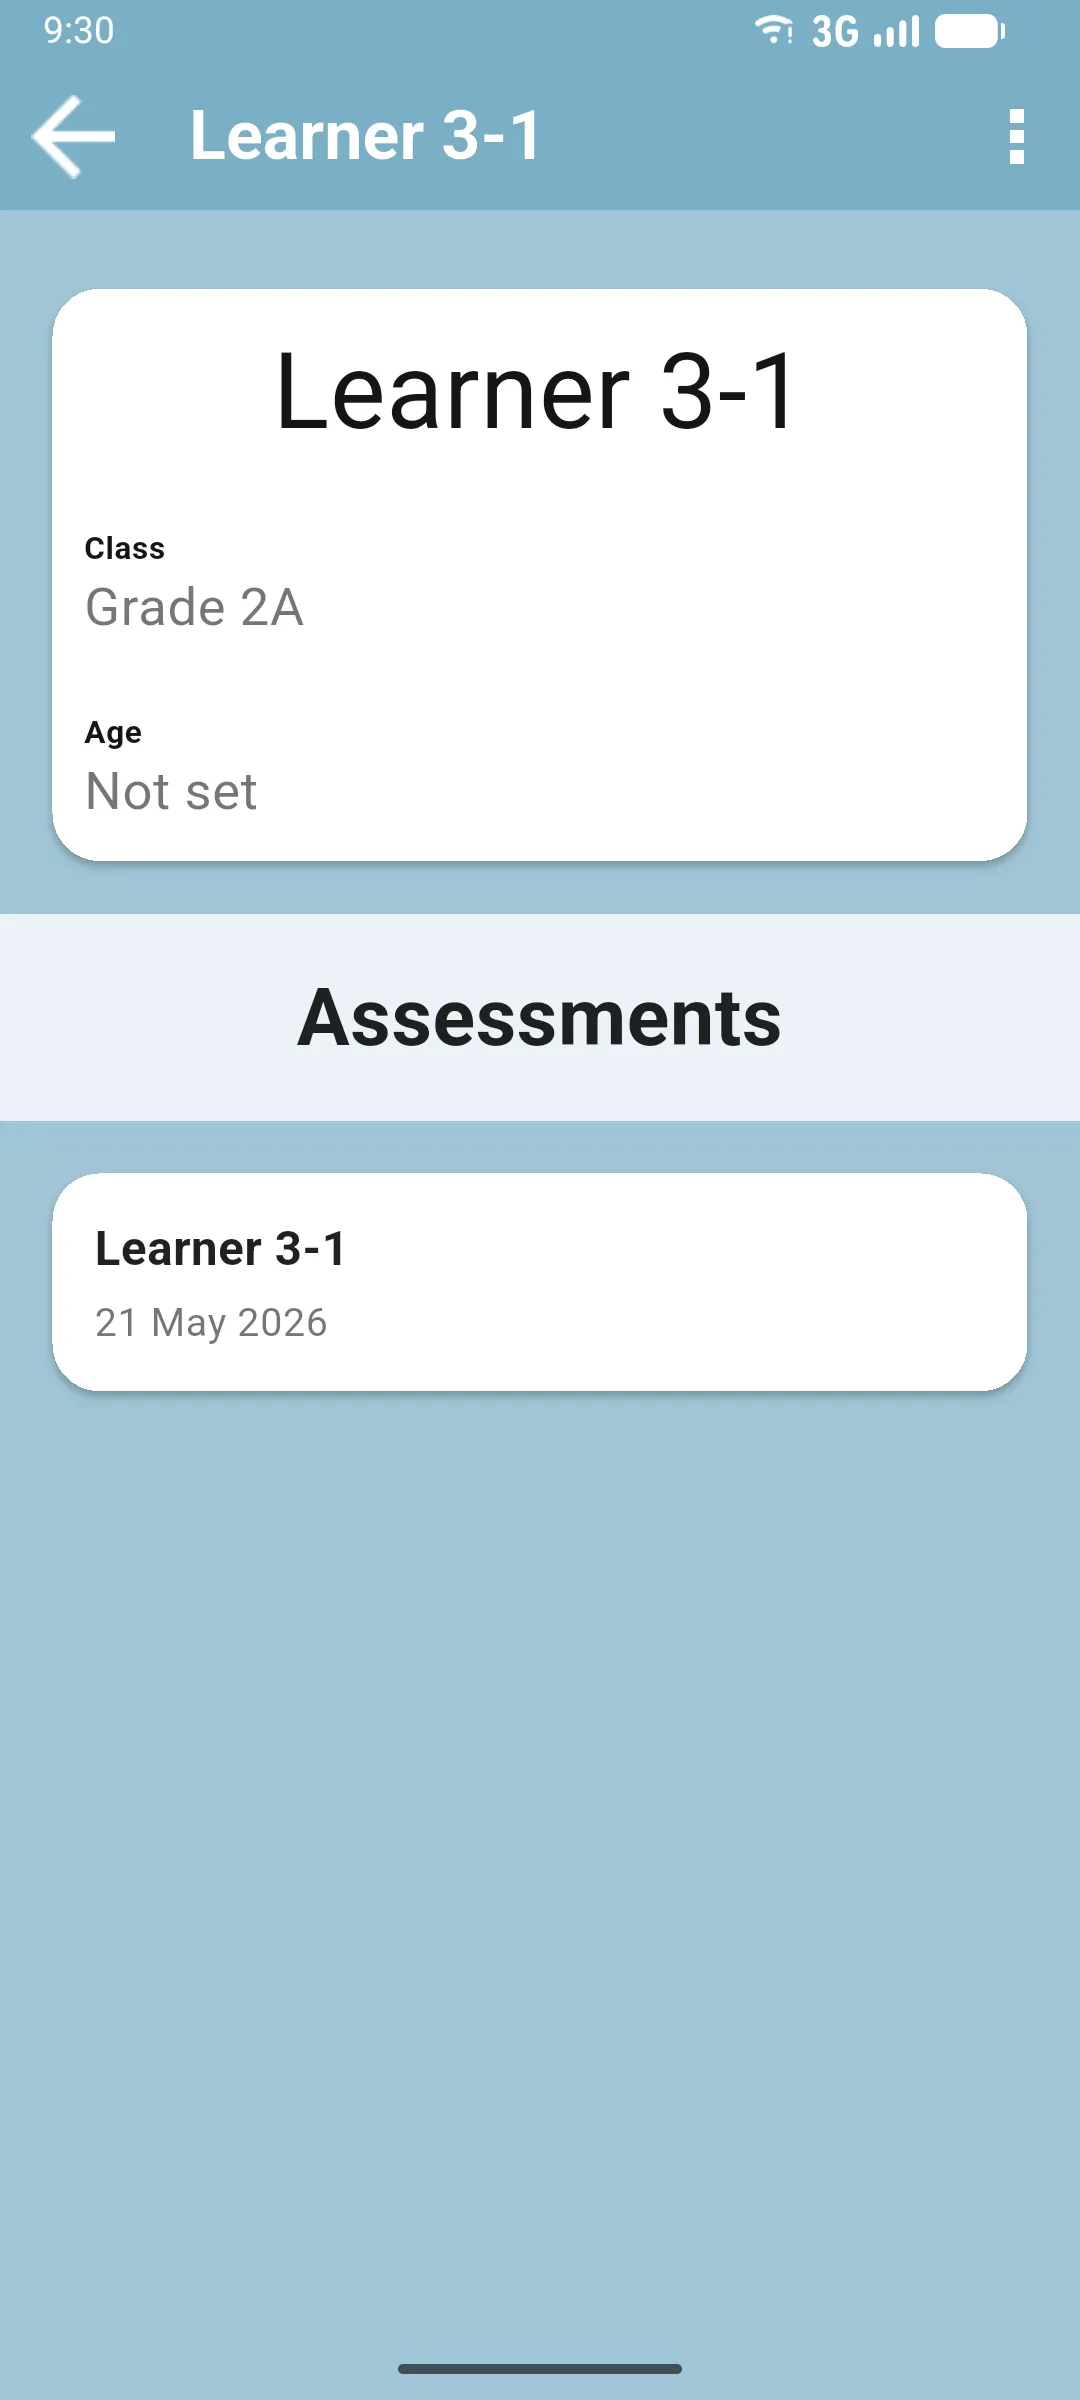
The pupil screen shows:
- The pupil’s name at the top.
- The Class they belong to.
- Their Age.
- A list of Assessments linked to this pupil, with the date of each one.
Tap an assessment to open it and review the answers.
4. Create a class
Section titled “4. Create a class”On the CLASSES tab, tap the yellow New Class button. A Class Name dialog opens: type the name and confirm. The class is created assigned to you and to the current year, and stays pending until the next sync.
5. Add a pupil
Section titled “5. Add a pupil”Open a class and tap Add Pupil. The Add New Pupil screen asks for:
- First Name (required).
- Last Name (required).
- Age (optional).
Fill in the names and save. If a required name is left empty the app shows an error and won’t save until you complete it. The new pupil is queued for the next sync.
6. Edit or delete a class or pupil
Section titled “6. Edit or delete a class or pupil”Both the class screen and the pupil screen have a three-dot menu in the top right:
- On a class: Edit Name to rename it, or Delete Class.
- On a pupil: Edit to change the name or age, or Delete.
Any rename, edit or deletion is saved locally and pushed on the next sync.