Conducting a school visit
The School Visit screen has three tabs: SCHOOL, TEACHERS and HISTORY. The yellow Complete Visit button sits at the bottom of every tab.
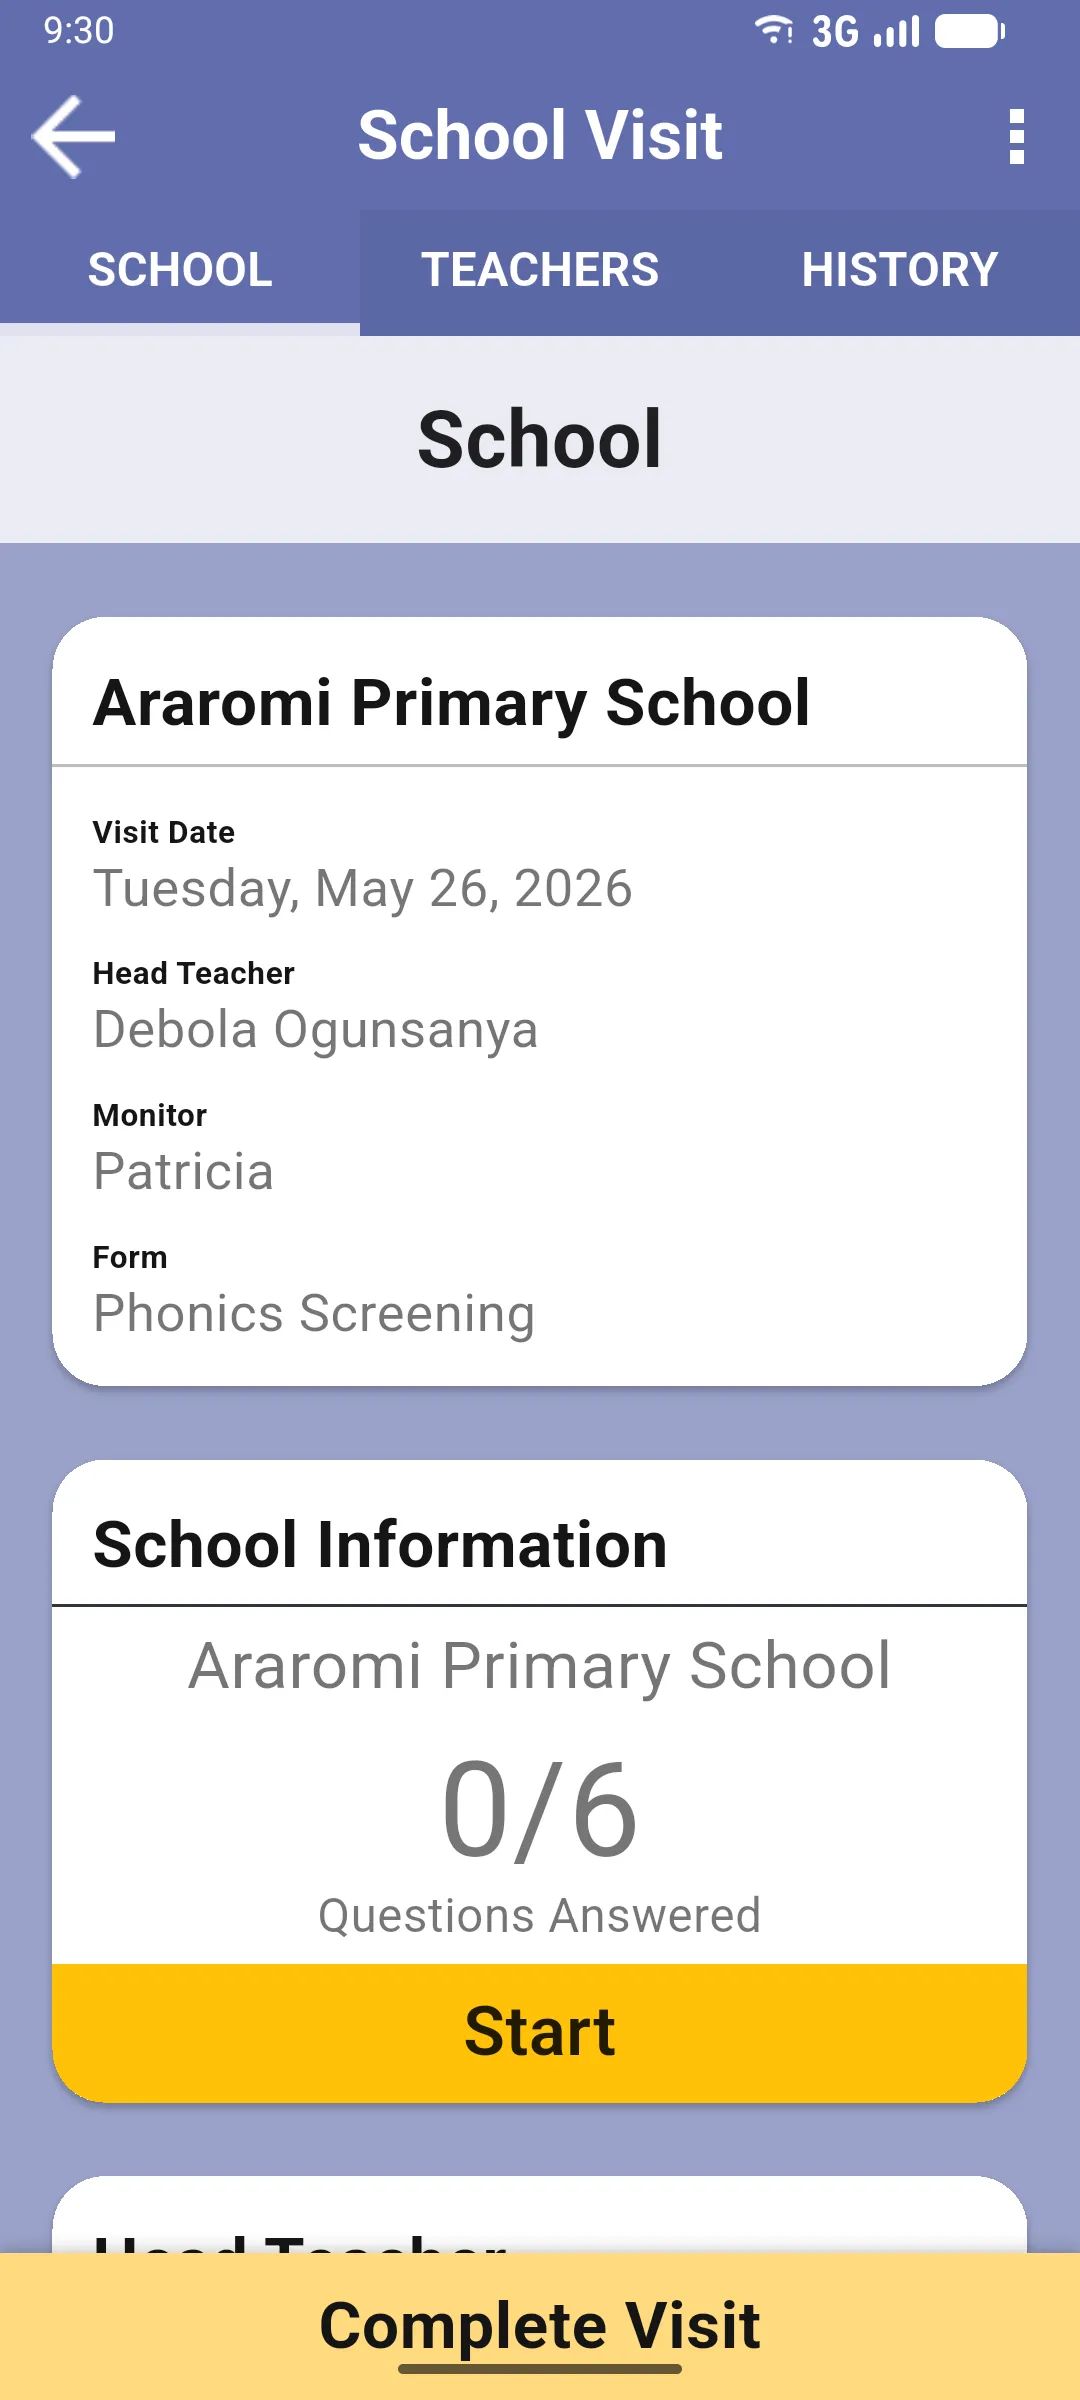
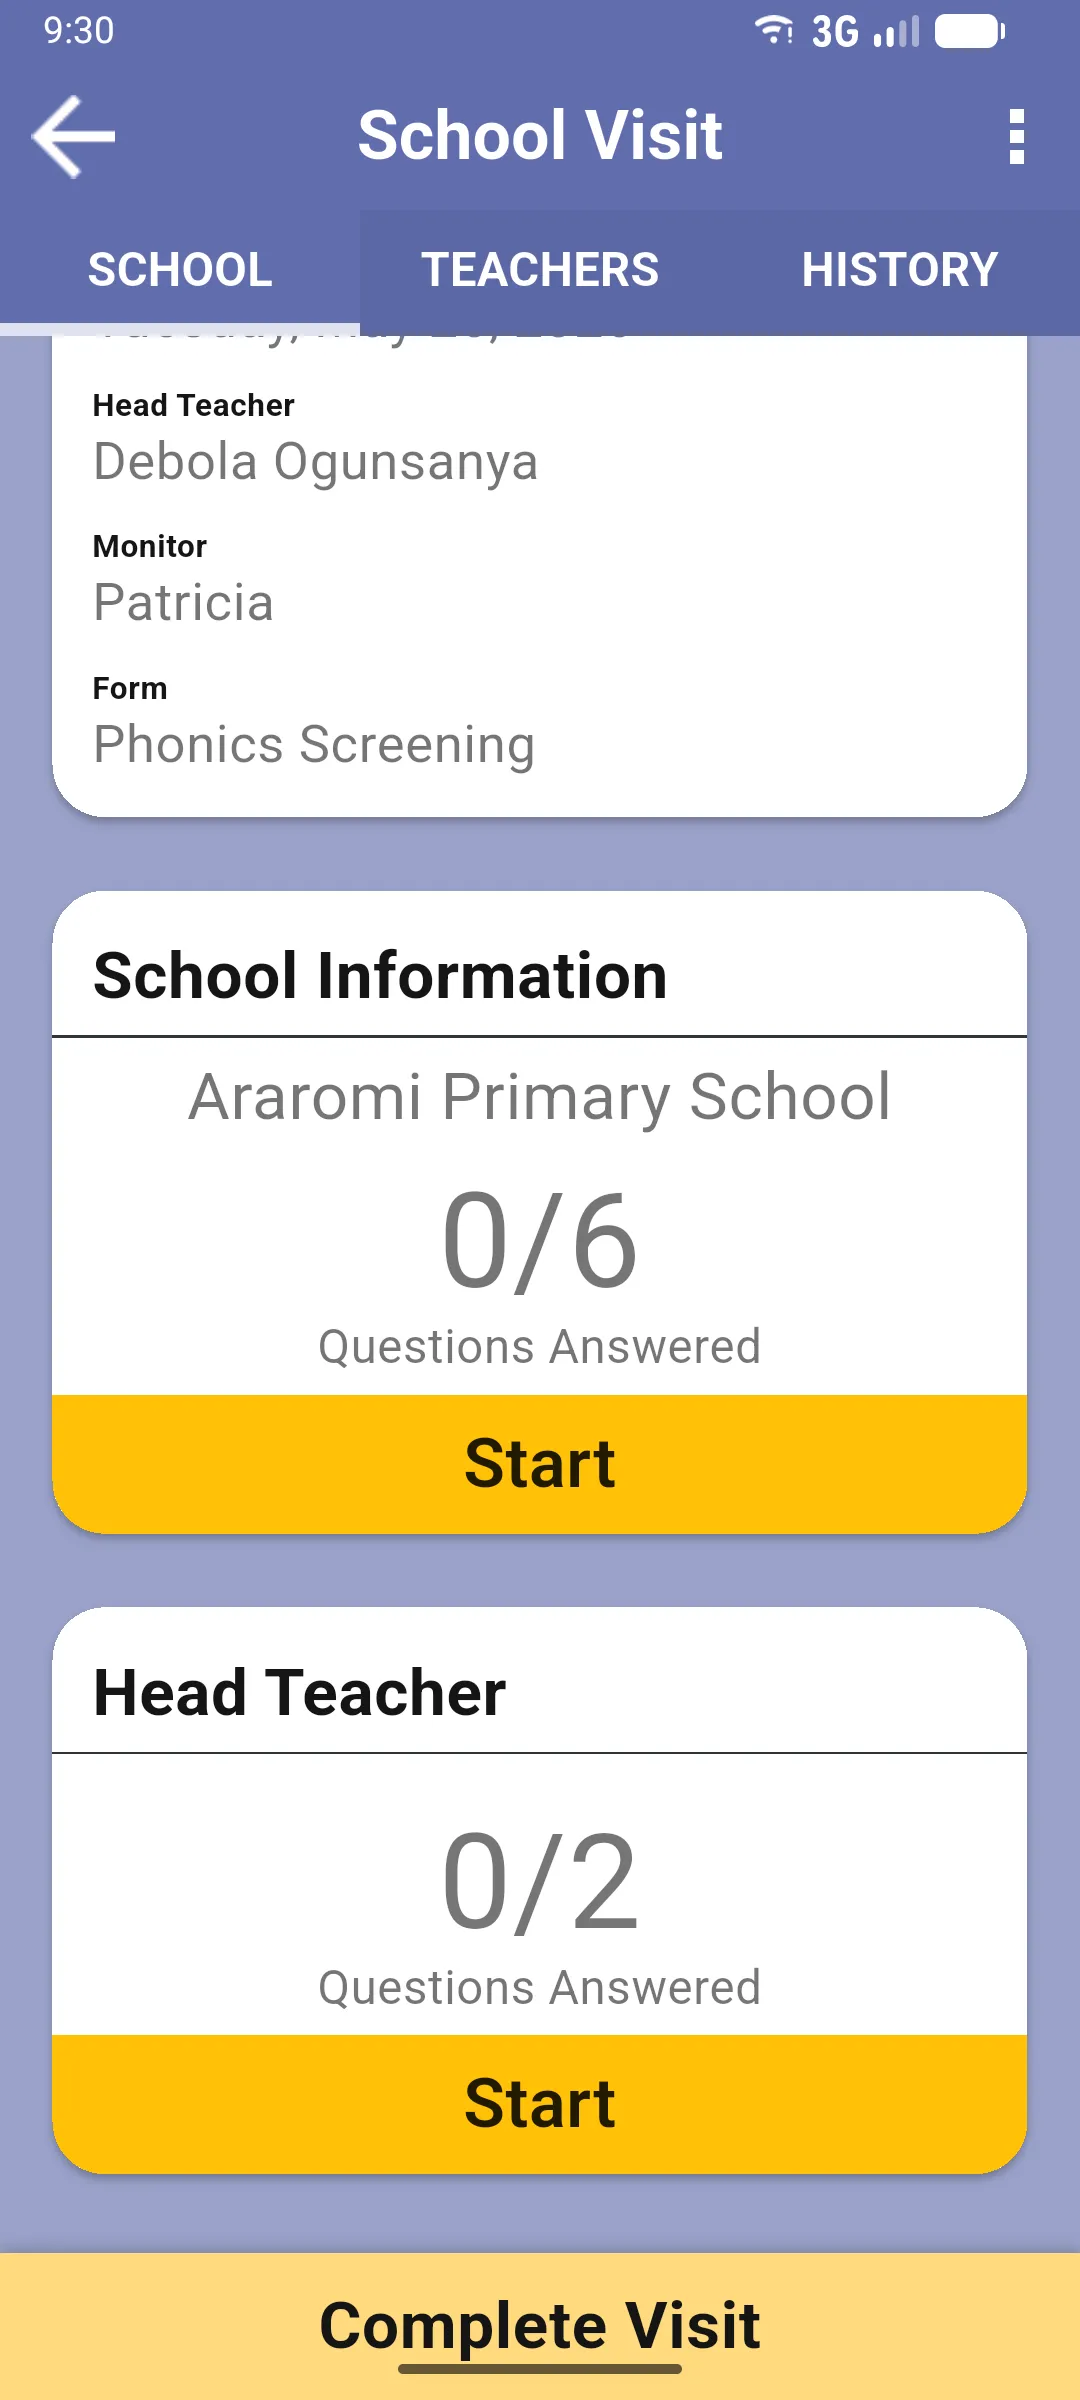
SCHOOL tab
Section titled “SCHOOL tab”Where you answer school-level questions. At the top, an info card with the school name, visit date, head teacher, monitor and form used. Below it, one card per question section (e.g. School Information, Head Teacher), each showing X/Y Questions Answered and a yellow Start button that opens the questions for that section. Which sections appear depends on the form.
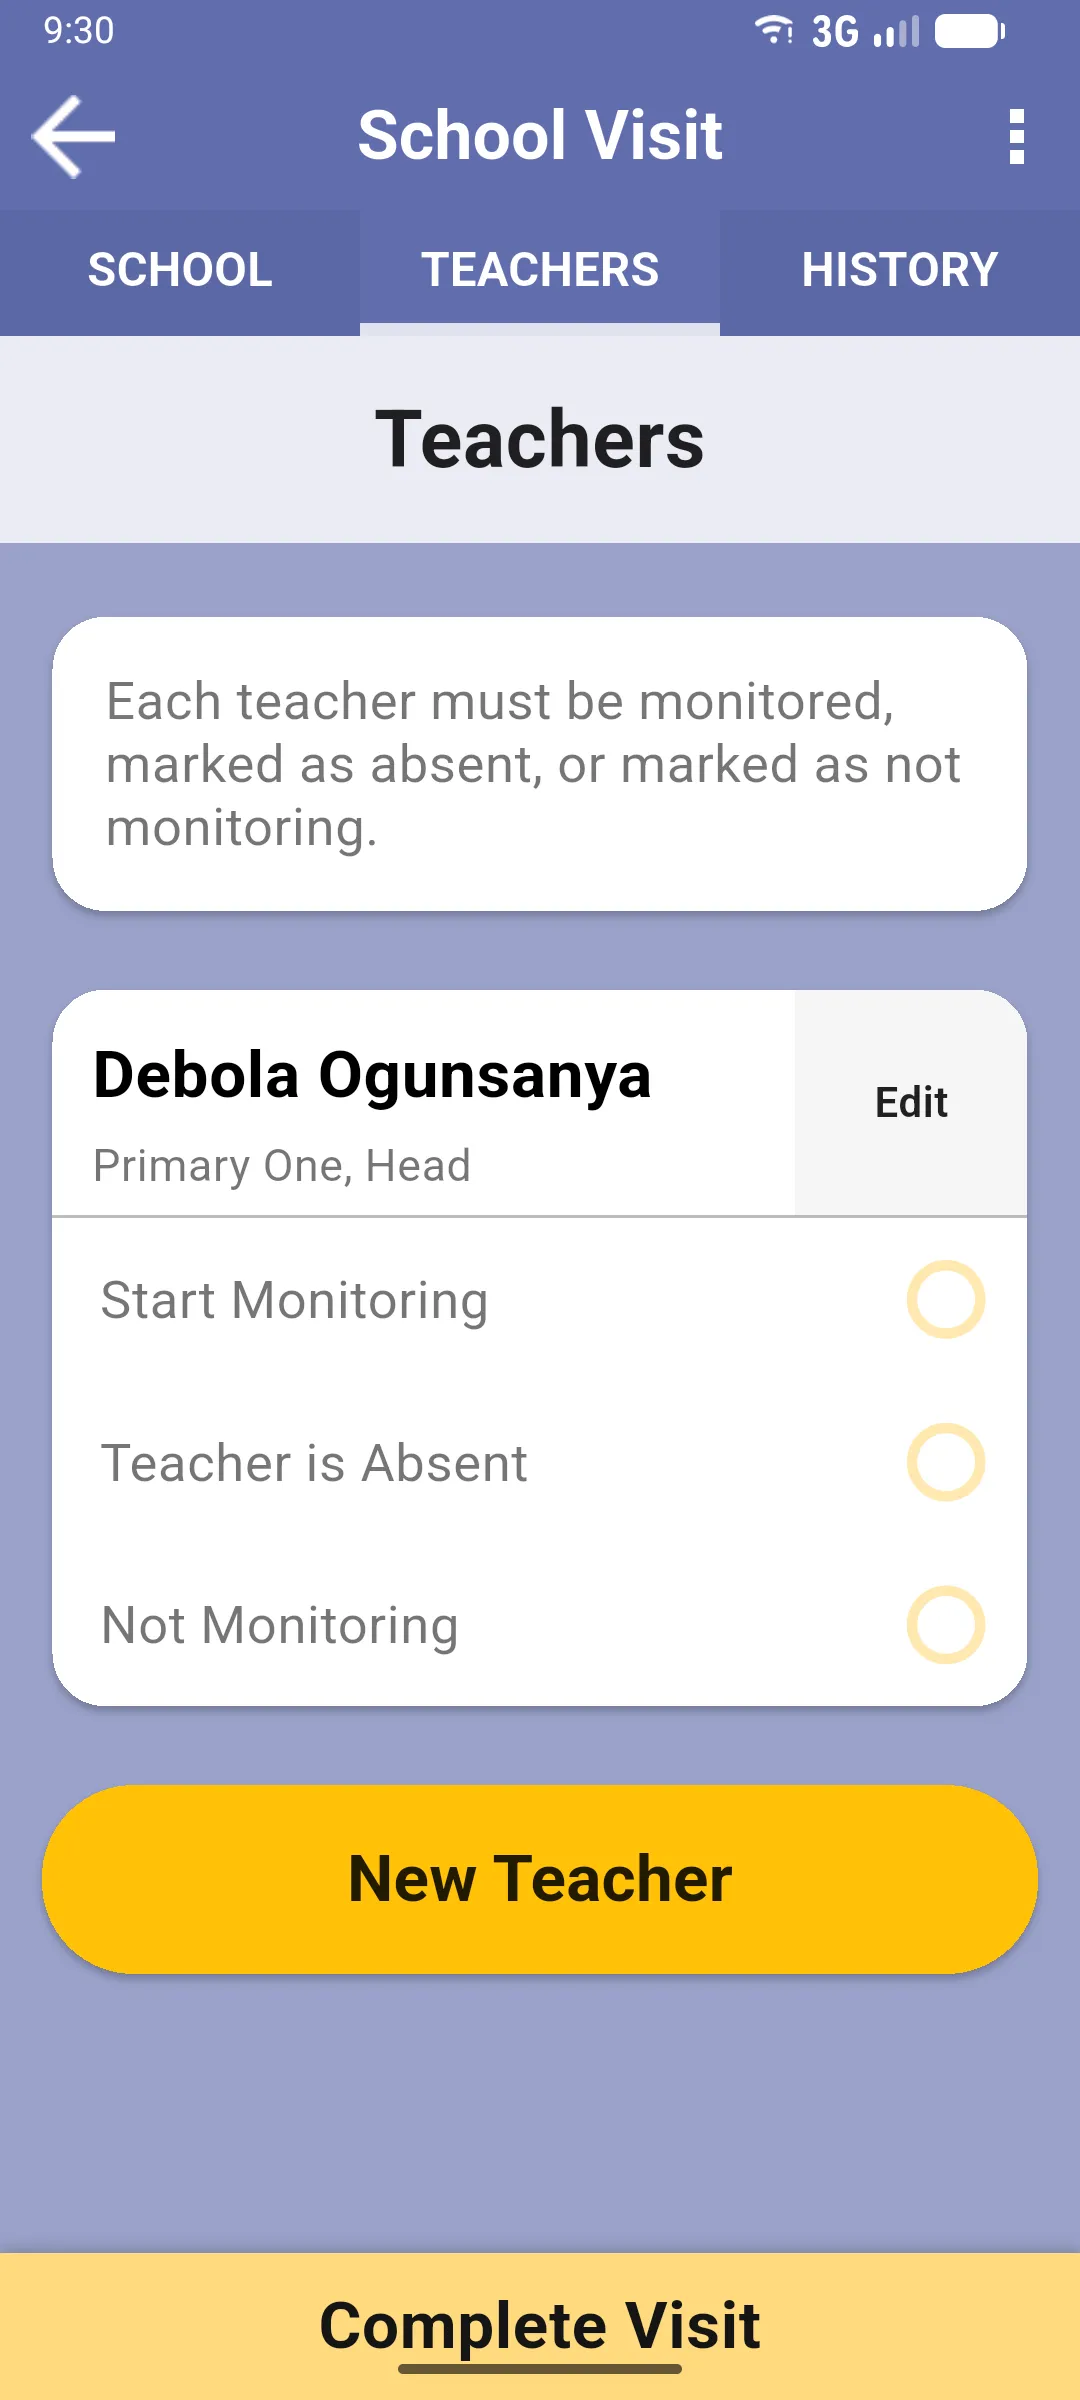
TEACHERS tab
Section titled “TEACHERS tab”One card per teacher in the school. Each card shows the teacher’s name and roles, an Edit button, and the options for what to do on this visit:
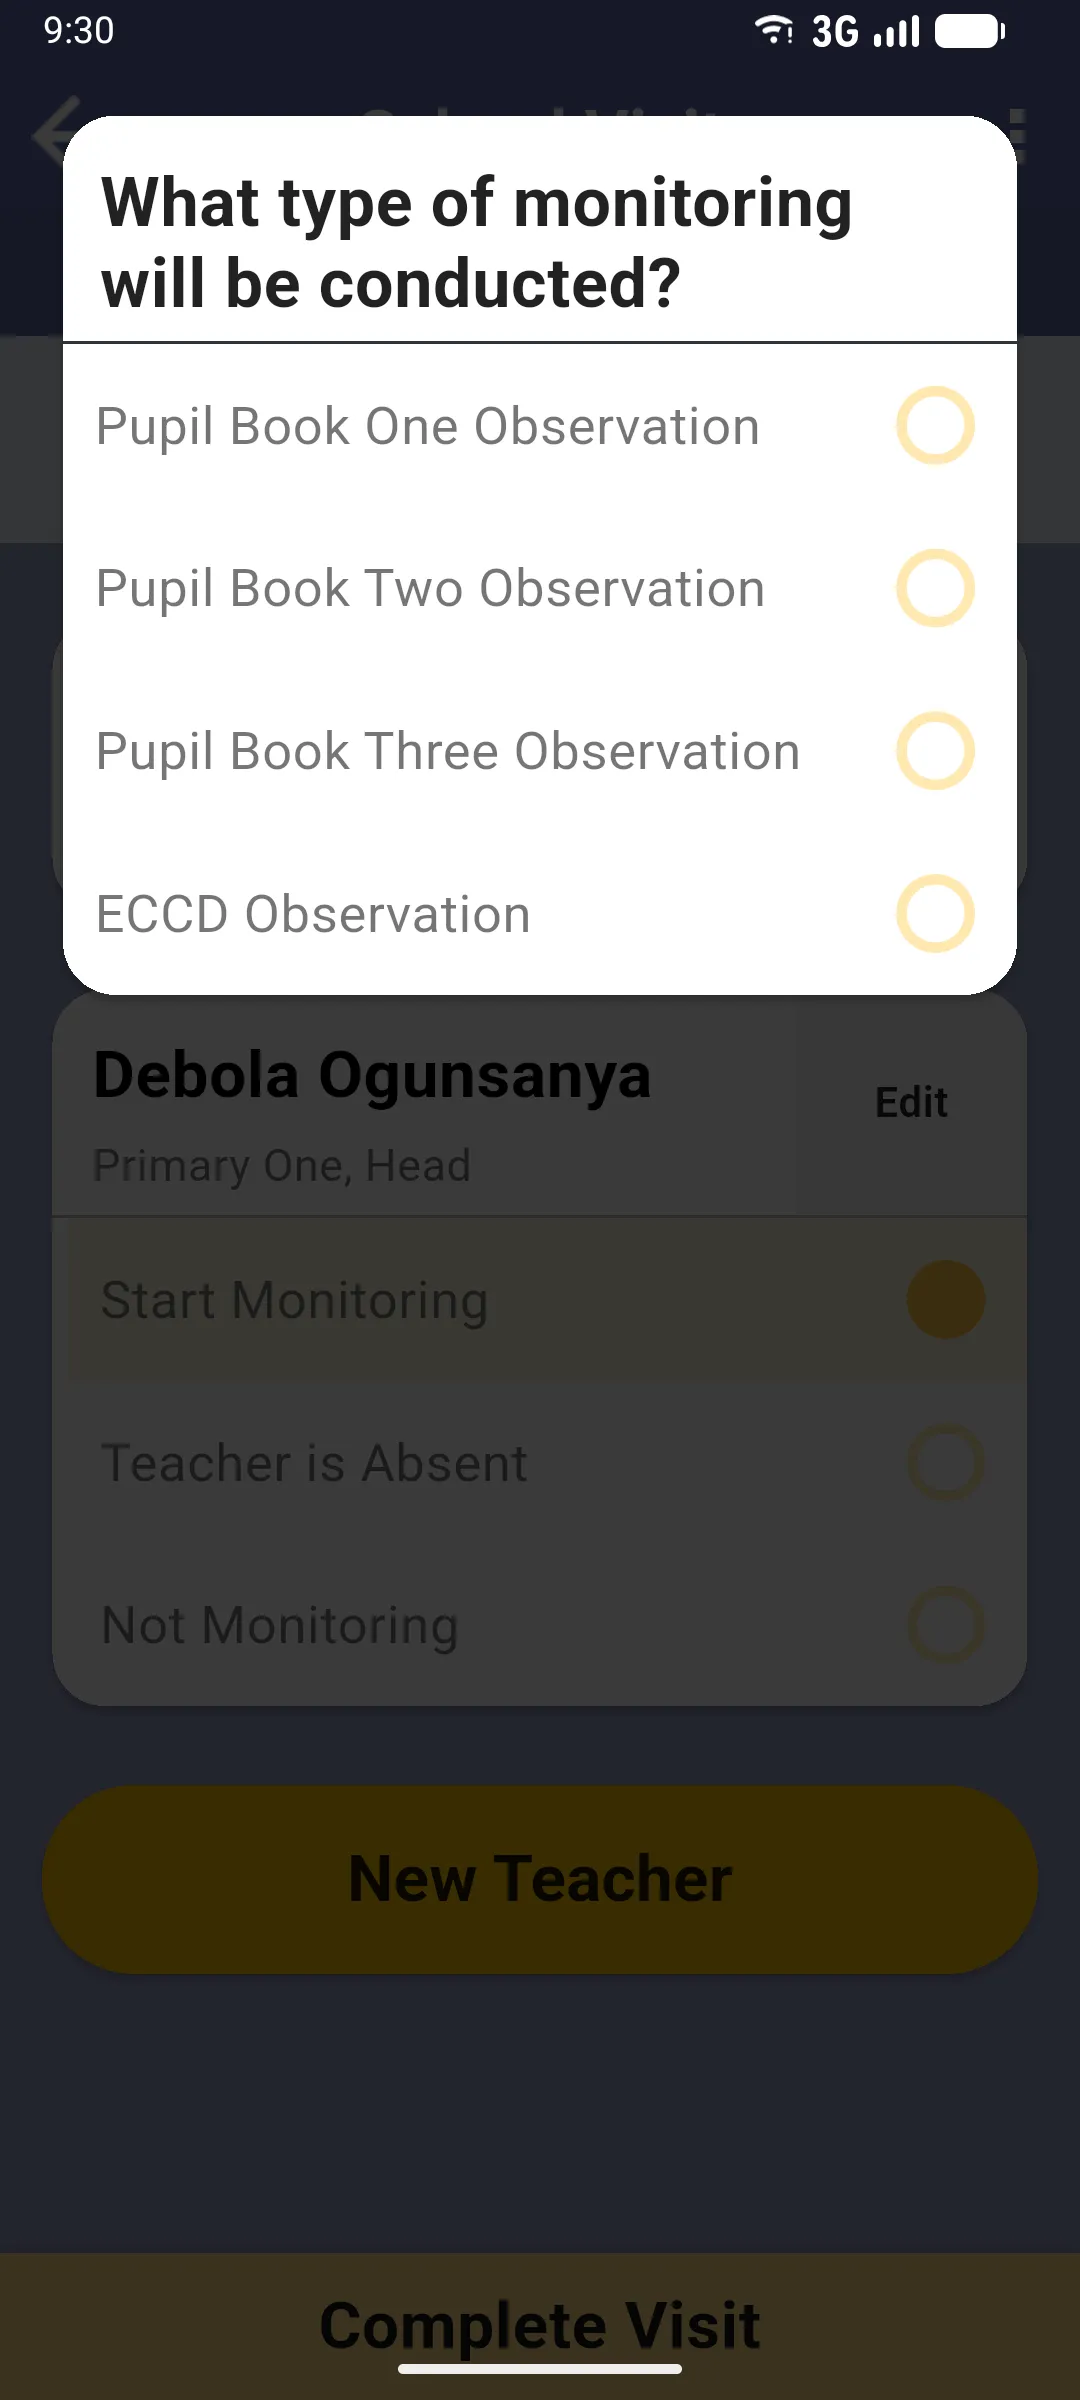
- Start Monitoring: open the monitoring form for that teacher.
- Teacher is Absent: record an absence. Hidden if your project’s form doesn’t include an absent-teacher form.
- Not Monitoring: skip this teacher.
The Edit button opens a dialog where you can change the teacher’s name and role, or Delete the teacher if it was added by mistake.
To add a teacher who isn’t in the list, use the yellow New Teacher button below the cards. This is the only place teachers are created: tap it, enter the name and pick the role, and the teacher is added and appears in the list.
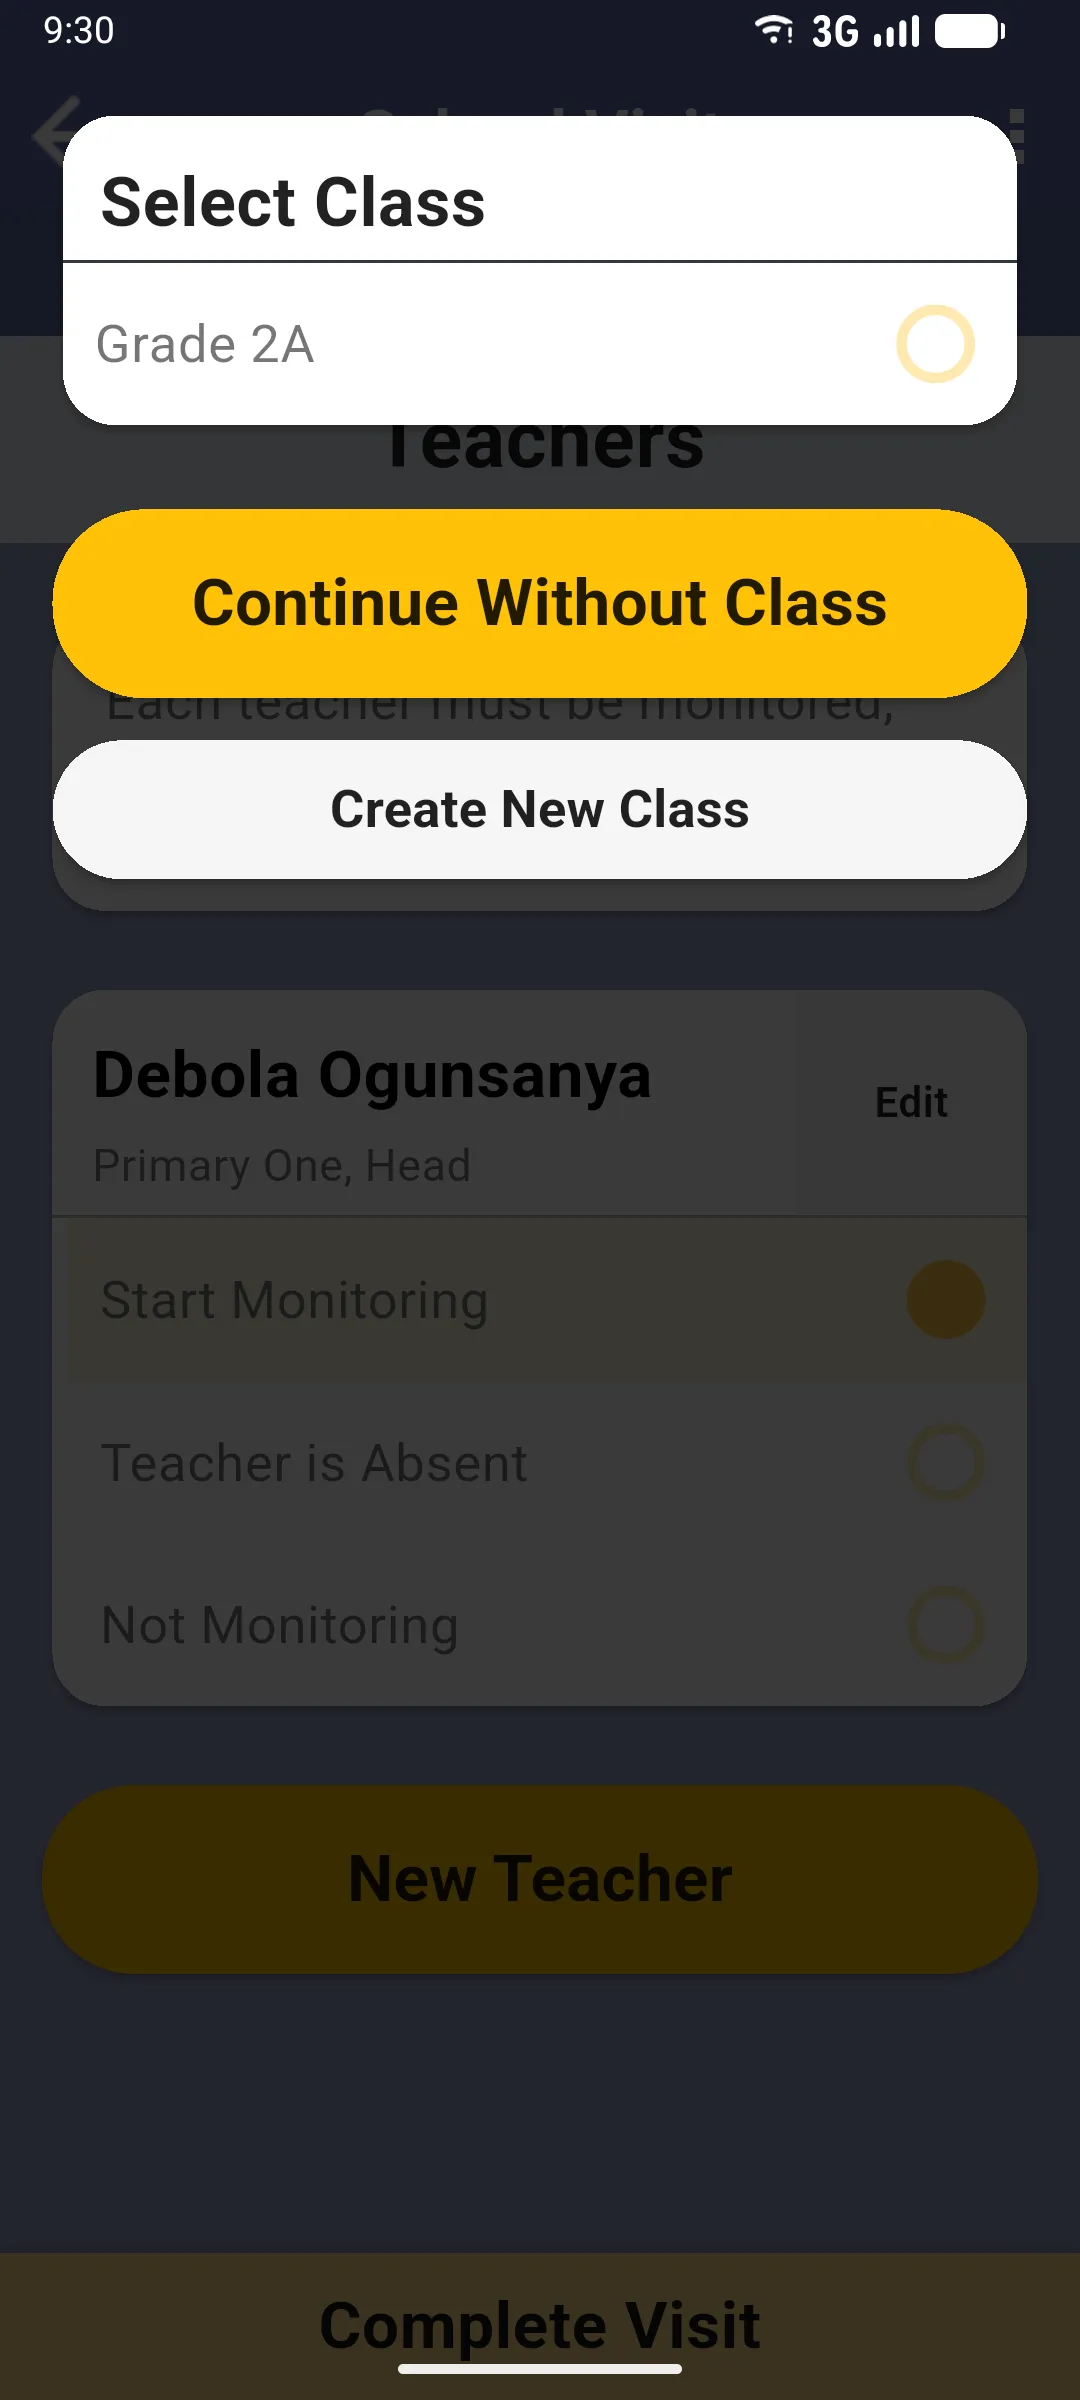
When you tap Start Monitoring, the app first asks which class the visit is for. This dialog only appears if the school has classes created beforehand; if there are none, the app uses Continue Without Class automatically and skips this step. You can also tap Create New Class to add one on the spot.
After the class step, if the form has more than one monitoring type, the app asks which one to run. If there’s only one, it’s selected automatically and this dialog doesn’t appear.
Once class and monitoring type are set, the teacher visit screen opens. From there you fill in the Teacher Questions, Lesson Observation and Pupil Assessments for that teacher. See Conducting a teacher visit.
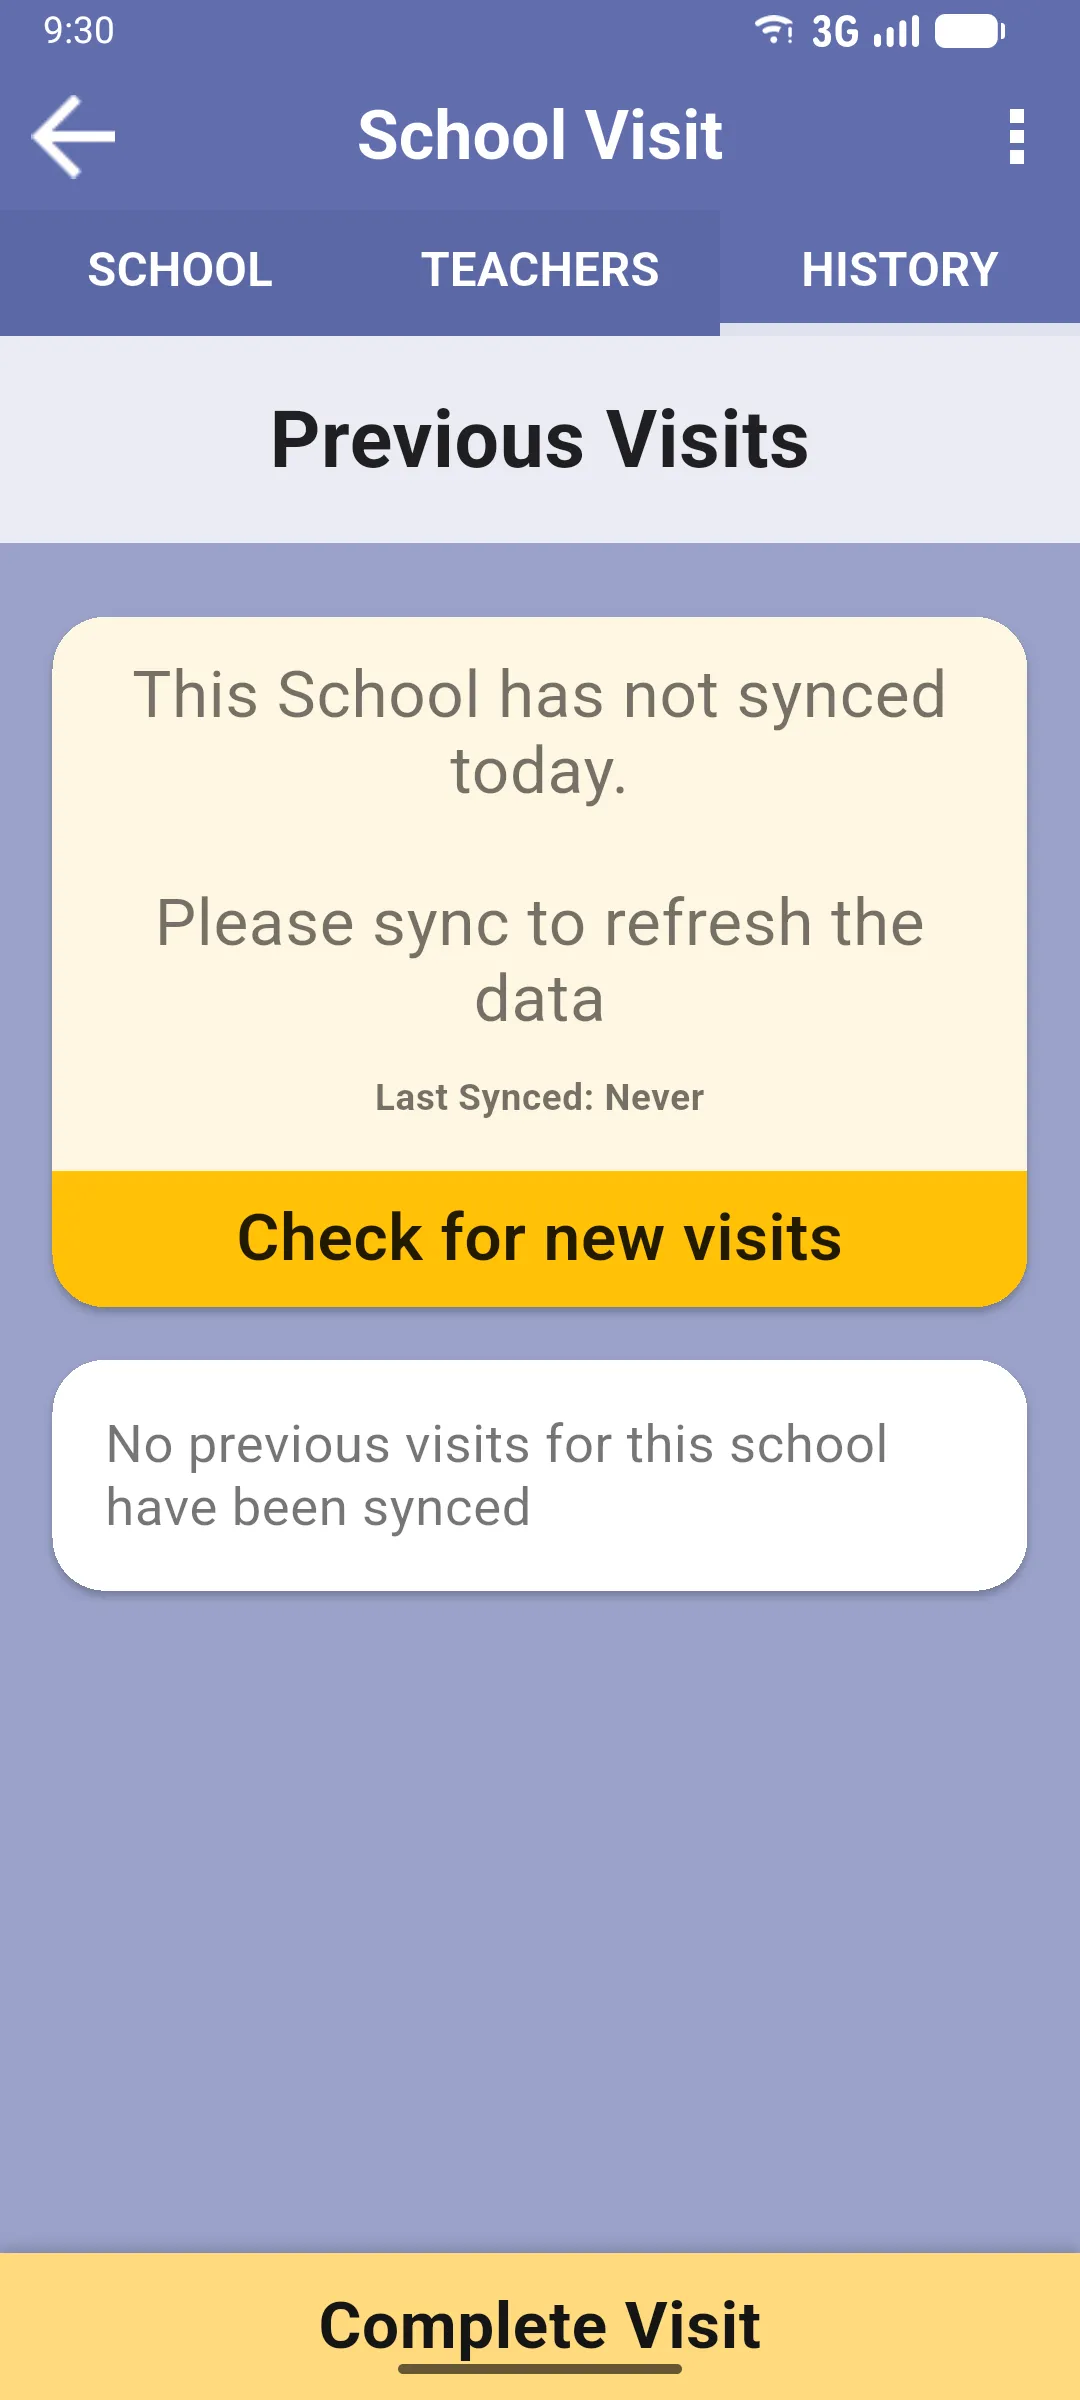
HISTORY tab
Section titled “HISTORY tab”Lists the visits to this school already on your device, with a sync card at the top whose label depends on the local sync state:
- Visits up to date (green): matches the server. Button: Sync Again.
- This School has not synced today (yellow): no sync today. Button: Check for new visits.
- There are visits not on this device (yellow): the server has visits you haven’t downloaded. Button: Download Visits.
Below the card, either the list of previous visits or the placeholder No previous visits for this school have been synced.
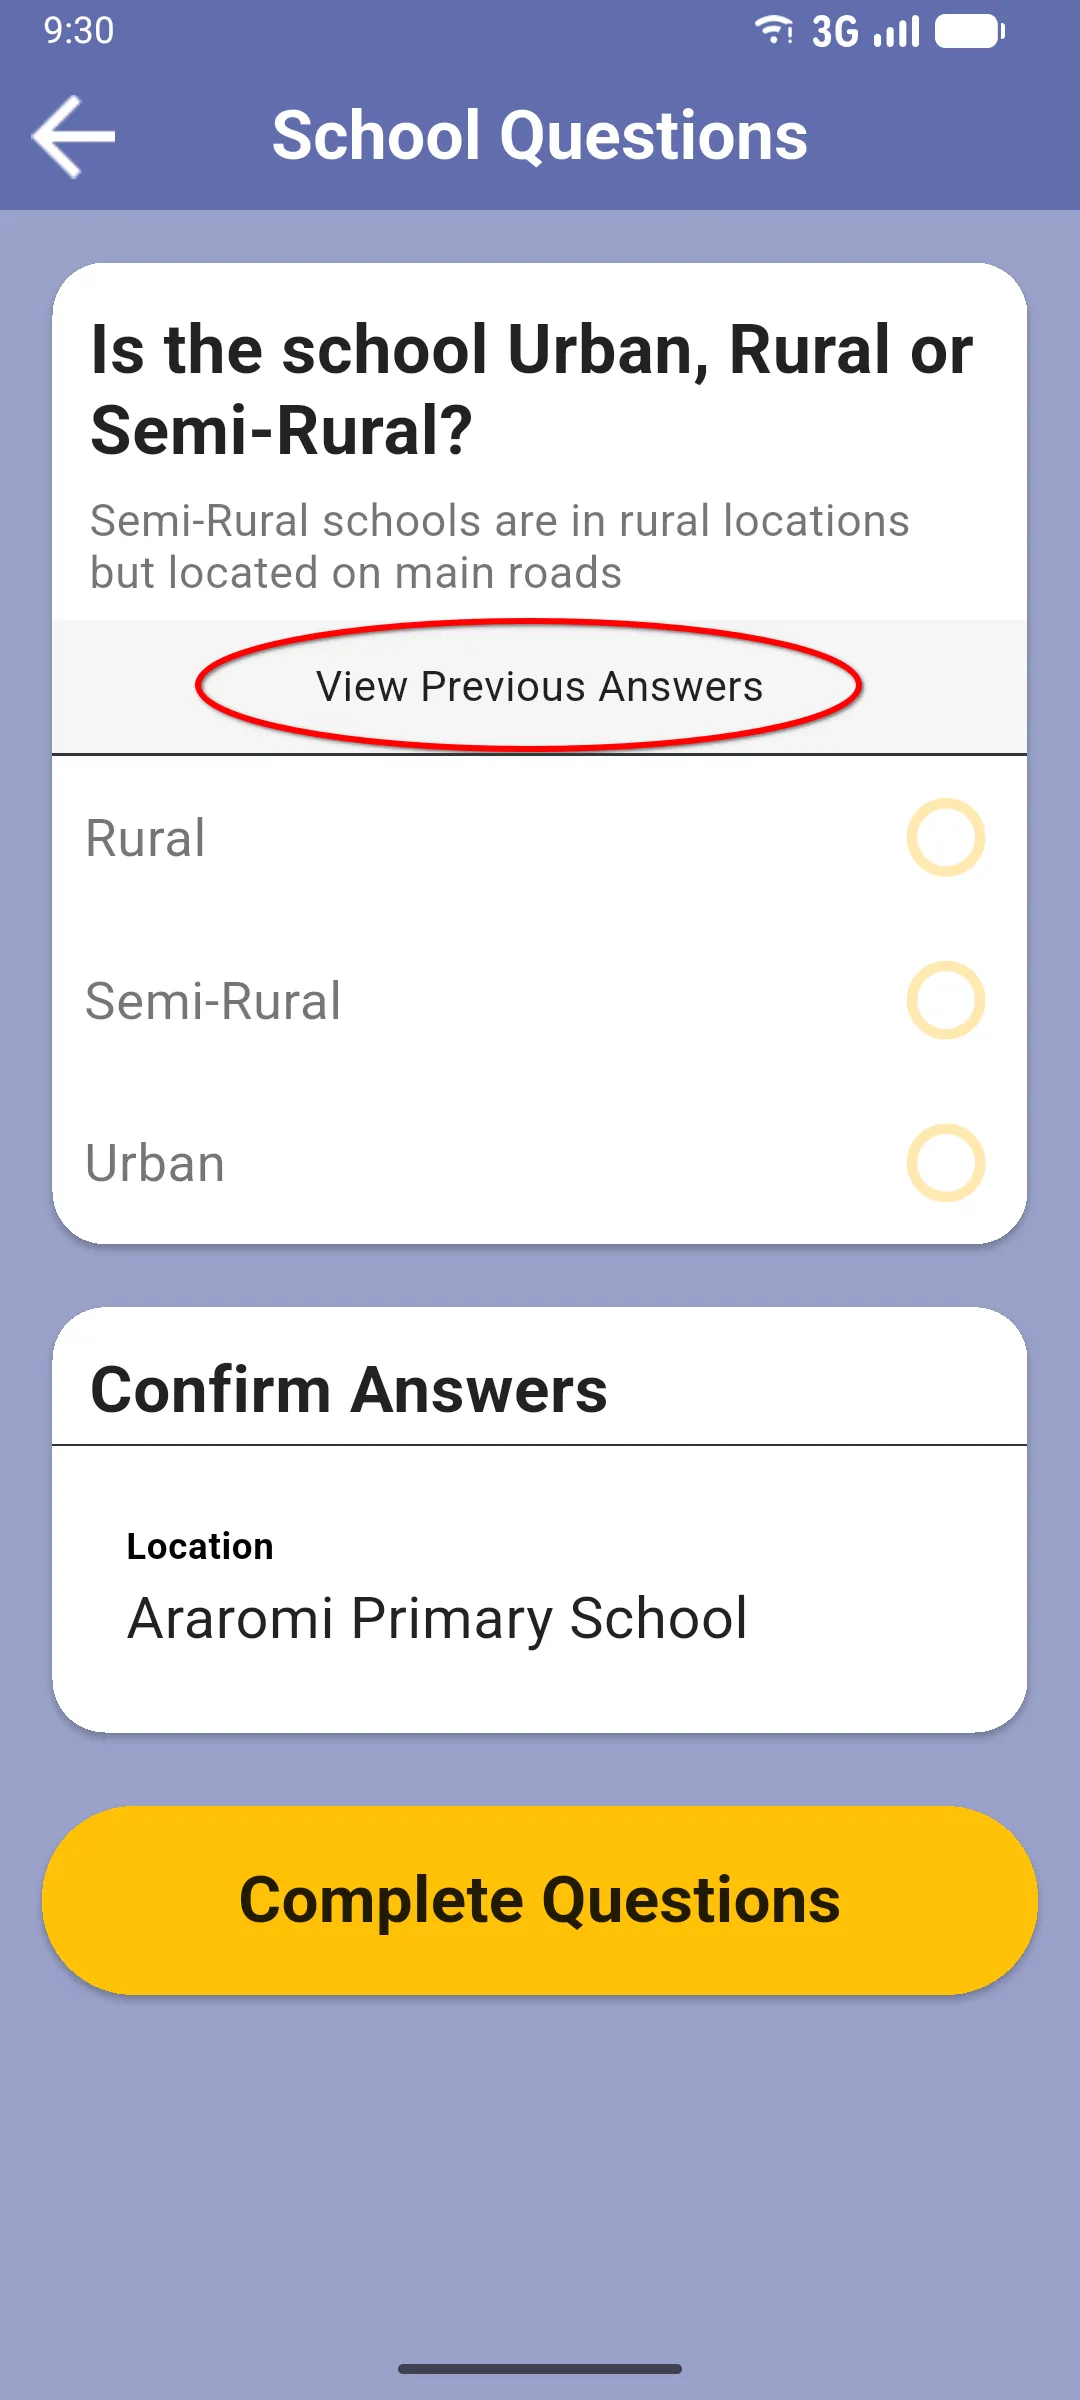
Previous answers
Section titled “Previous answers”Recurring questions (those asked on every visit to the same school, teacher or pupil) show a View Previous Answers link below the question text. Tap it to open a dialog with the past values, most recent first, each with its date. If the link doesn’t appear, that question has no history or isn’t configured as recurring.
Completing the visit
Section titled “Completing the visit”When done, tap Complete Visit at the bottom. The visit is marked complete and queued for sync.
Next: Marking a teacher absent or not monitoring